
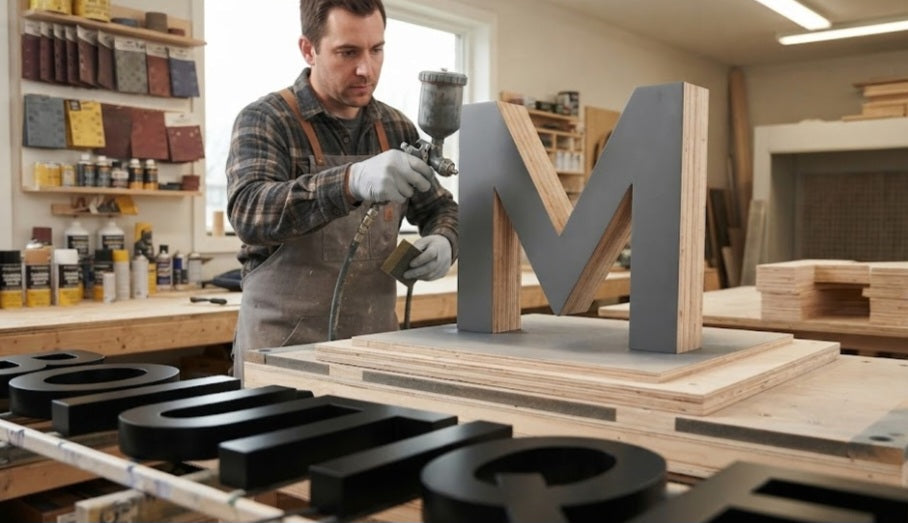
When you step inside a high-end retail boutique or a sleek modern showroom, eye-catching dimensional signage commands immediate attention. CNC-cut plywood letters offer a fantastic organic warmth and structural depth for brand displays, but pulling them straight off the router bed leaves them looking unfinished. Between rough edge veneers, visible multi-ply glue lines, and micro-splinters, transforming raw wood cutouts into a polished, professional commercial display requires a disciplined finishing workflow.
Achieving a luxury retail aesthetic means moving beyond basic sanding and treating every layer of the plywood with deliberate care. Let's explore the step-by-step finishing protocol required to turn raw CNC-cut plywood letters into striking, premium retail branding elements.
Conquering Ply Lines:
The alternating light and dark grain layers visible on the edges of standard plywood can look messy if left unaddressed, requiring strategic filling or accentuating.
Surface Prep and Grain Raising:
Raising wood grain during water-based priming requires intermediate sanding passes to ensure a glass-smooth final coat.
Edge Sealing Mastery:
Plywood edges are notoriously porous and absorb paint unevenly unless sealed with high-solid fillers or sanding sealers first.
Professional Mounting Integration:
Designing blind-pin mounting or flush-mount standoff channels into the back of your letters secures them cleanly to retail walls without visible hardware.
Step-by-Step Finishing Protocol
Taking plywood letters from a raw state to a showroom-ready finish demands patience and a systematic approach to sanding, sealing, and coating.
Initial Edge Cleanup and Deburring:
Inspect all cut edges for micro-splinters or fuzz left behind by the router bit. Use a fine 120-grit sanding sponge or a micro-file to smooth the perimeters without rounding over sharp vector corners.
Addressing the Ply Voids:
Apply a lightweight wood filler or high-adhesion spackle along the exposed plywood edges to fill any small internal voids or core gaps common in standard sheet goods. Once dry, sand flush with 180-grit sandpaper.
Applying a High-Solid Sanding Sealer:
Brush or spray a coat of sanding sealer over the entire letter. Plywood edges will drink up moisture and swell; the sealer locks down the loose wood fibers and creates a uniform barrier for your paint or stain.
Intermediate Sanding Passes:
Knock down any raised grain after the sealer cures using 220-grit sandpaper. The surface should feel silky smooth and uniform across both the face veneers and edge plies.
Color Application and Topcoats:
Apply multiple thin, even coats of professional lacquer, satin enamel, or tinted wood stain using an HVLP spray gun for a flawless, brush-stroke-free commercial finish.
Curing and Protection:
Allow the final topcoat to cure fully for at least 48 hours before handling or packaging the letters for retail site installation to prevent marring or chemical soft spots.
Edge filling and topcoat application, achieving a truly seamless commercial look requires accounting for ambient humidity-induced dimensional shift and wood movement. Plywood is engineered to be structurally stable, but its exposed edges and face veneers react differently to the fluctuating HVAC climates found inside modern shopping malls and retail storefronts. If letters are finished with rigid, non-flexible conversion varnishes without adequately sealing the back mounting surface, seasonal humidity changes can cause micro-expansion along the glue lines, leading to telegraphing lines where the internal plies become visible through the paint. Applying a moisture-barrier balancing coat to the rear of every letter neutralizes vapor absorption, guaranteeing that your retail signage remains pristine and warp-free under aggressive commercial lighting and climate control.
Finishing CNC-cut plywood letters for a retail display bridges the gap between rough workshop fabrication and polished commercial presentation. By mastering edge filling, sanding sealer application, and precise topcoat techniques, you can elevate humble sheet goods into stunning, high-end branding elements that captivate customers.


