
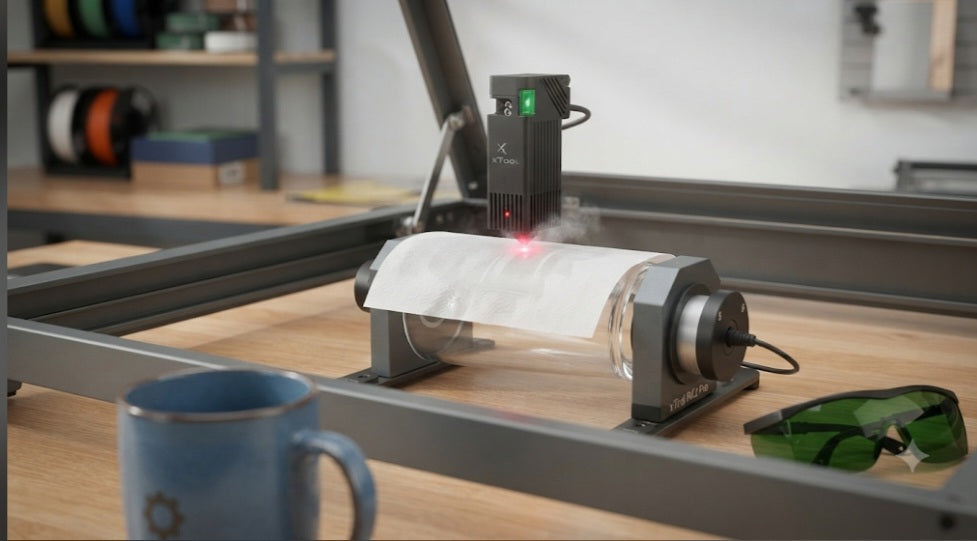
Laser engraving glassware—such as pint glasses, wine glasses, mirrors, and glass bottles—is one of the most rewarding projects you can take on. However, glass behaves very differently than wood, leather, or coated metals. Because glass is transparent and brittle, it can crack under uneven heat if you don't use the right techniques.
This beginner's guide covers everything you need to know to get started with clean, professional results.
Choosing the Right Laser for Glass
Not all lasers can mark glass directly:
CO₂ Lasers (Best Choice):
CO₂ lasers (like the xTool P2 or similar workshop lasers) are the gold standard for glass. The glass absorbs the wavelength of a CO₂ laser well enough to fracture the surface microscopically, creating a frosted, opaque white mark.
Diode Lasers (Requires a Trick):
Standard blue-light diode lasers pass straight through clear glass without doing anything. To engrave glass with a diode laser, you must use a workaround: coat the glass with a layer of tempera paint, a wet paper towel, or specialized marking spray, let it dry, run the laser to burn the coating (which transfers heat to the glass), and then wash off the residue.
Essential Equipment & Prep
Rotary Attachment:
Since most glassware is cylindrical, a roller or chuck-style rotary tool is required to rotate the glass smoothly as the laser fires.
Safety Gear:
Always wear appropriate laser safety glasses matched to your machine's wavelength.
Cleaning:
Wipe the glass thoroughly with rubbing alcohol to remove fingerprints, dust, or oils before engraving.
Step-by-Step Engraving Workflow
Mount the Glass:
Secure your glassware firmly onto your rotary attachment, ensuring it sits level and doesn't wobble or slip when rotated.
Focus the Laser:
Set your focal distance precisely on the surface of the glass. An incorrect focus spreads the laser beam out, weakening the power and causing uneven fracturing.
Adjust Your Software Settings (The "Dot" Trick):
Instead of running a solid fill at 100% power (which can cause glass to shatter from heat buildup), many professionals use a grayscale or dotted/stippled pattern (around 150–300 DPI).
Keep your power moderate and speed medium-to-fast. High power combined with slow speed traps heat and causes glass pieces to flake off randomly ("chipping").
Run the Job:
Run your design. You should see a fine, frosted white etch appearing where the laser hits.
Pro-Tips for Flawless Results
The Wet Paper Towel Trick (For CO₂ and Diodes):
If your glass is chipping or the frost isn't coming out opaque enough, apply a thin, damp paper towel smoothly over the glass surface and roll out any air bubbles. Run the laser right through the wet paper. It absorbs thermal shock, cools the glass instantly, and yields a much smoother, crisper white frost.
Cleaning Up:
Once finished, wash the glass with warm water and soap. For stubborn glass shards or residue, use a non-scratch scouring pad or a bit of steel wool gently over the engraved area, then wipe clean.


