
Getting a brand-new 3D printer delivered to your door is super exciting, but before you hit print on that massive 24-hour model, you need to go through the proper setup steps. Here is a complete, step-by-step checklist to take you from a sealed cardboard box to your very first successful first layer.
Step 1:
Unboxing and Inspection
Clear a stable workspace:
Set your printer on a sturdy, flat table or workbench that won't wobble when the print head moves rapidly.
Unpack with care:
Cut away tape, remove zip ties securing the gantry or print head for shipping, and lift out all included accessories (scrapers, power cables, sample filament, and tools).
Check the hardware:
Inspect the frame, belts, and wiring harness to ensure nothing rattled loose during courier transit.
Step 2:
Mechanical Assembly
Mount the gantry:
If your machine came semi-assembled, secure the upright frame to the base using the provided screws and Allen keys.
Check belt tension:
Belts should feel like a low-pitched guitar string—firm, but not overly tight. If they are sagging, use the tensioner knobs to adjust them.
Inspect lead screws and rollers:
Ensure the z-axis lead screw is lubricated and that the eccentric nuts on the print head and bed wheels are snug so there is no side-to-side wiggle.
Step 3:
Powering Up and Loading
Filament
Verify voltage:
Double-check that the power supply's local voltage switch (if applicable) is set correctly for South African mains supply.
Plug in and power on:
Connect the power brick or cable and switch on the machine.
Preheat the hotend:
Navigate to the printer menu, select preheat (around 200^\circ\text{C} for PLA), and feed your starter roll of filament into the extruder until it flows cleanly out of the nozzle.
Step 4:
Bed Levelling (The Most Important Step)
Home all axes:
Use the interface to home the printer so the nozzle moves to the front-left corner.
Disable steppers:
Turn off the stepper motors so you can manually slide the bed and print head around.
The paper test:
Slide a standard piece of printer paper between the nozzle and the build plate at all four corners and the center. You should feel a slight, gentle friction against the paper.
Adjust leveling knobs:
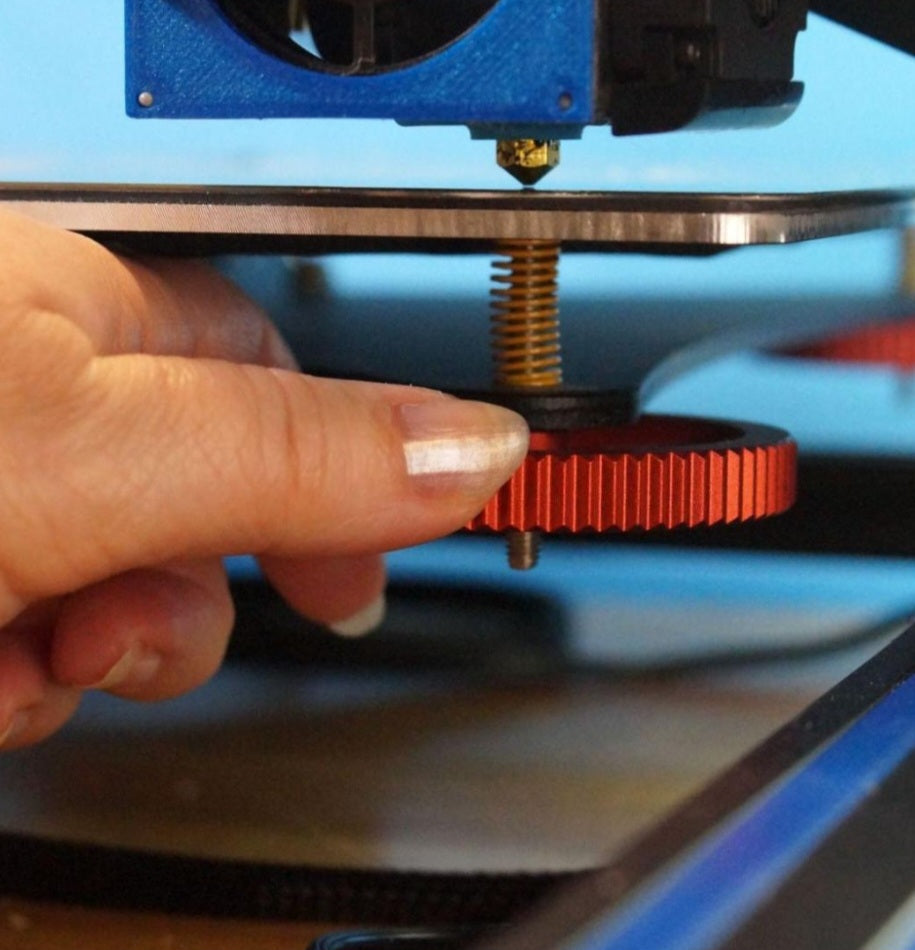
Turn the thumbscrews underneath the bed up or down until that friction is consistent across all points. Run through the cycle twice to ensure accuracy.
Step 5:
Printing the Test Model
Load your test file:
Insert the SD card or USB drive that came with the printer and select the pre-sliced test file (often a small token, cat, or dog).
Watch the first layer:
Do not walk away immediately! Watch the first few lines lay down on the bed. If the plastic isn't sticking, stop the print, adjust your bed level slightly closer, and try again.
Transitioning a newly arrived 3D printer from a courier box into an operational machine requires methodical attention to detail, from checking frame alignment and wiring harnesses to dialing in the perfect first layer. Taking the time to execute these foundational setup steps prevents frustrating print failures and protects your initial equipment investment.


