
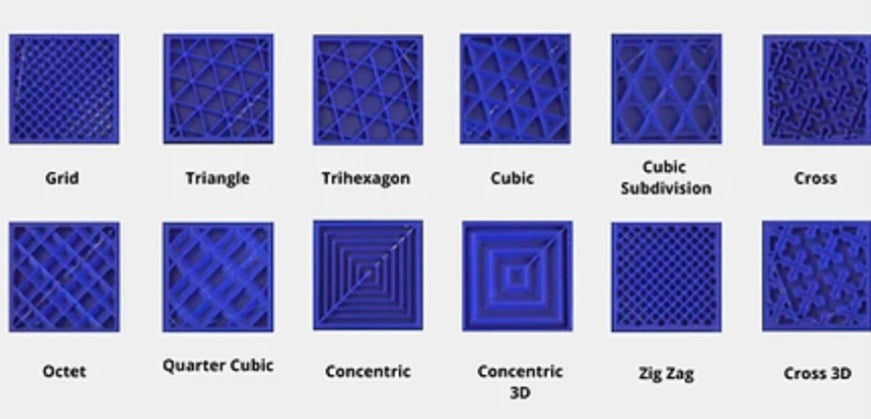
When configuring a 3D print in your slicer, it is tempting to crank the infill up to 100% out of a desire for maximum strength. In reality, doing so is almost always a waste of time, plastic, and money.
Understanding how interior structures distribute stress will help you optimize your print times and material usage without sacrificing structural integrity.
The 15% to 20% "Sweet Spot"
For the vast majority of everyday functional parts, decorative items, and general prototypes, an infill density between 15% and 20% offers all the structural backing you will ever need.
Best Used For:
Brackets, enclosures, tabletop models, and non-load-bearing mechanical components.
Why It Works:
FDM structural strength is primarily determined by your perimeter walls (perimeters/shells) and top/bottom solid layers, not the inner core. Once you have 3 or 4 outer walls, the infill simply acts as scaffolding to support the top layers.
Low Infill (5% to 10%)
When you are printing large models where weight, material economy, and speed are your top priorities, dropping down to a sparse infill is the way to go.
Best Used For:
Cosplay armor, large statues, lightweight visual props, and large master molds.
Why It Works:
It drastically slashes filament consumption and cuts down print hours significantly. Pair a low infill percentage with a strong cubic or gyroid pattern to maintain surprising rigidity over broad spans.
High Infill (40% to 100%)
Maxing out your internal structure is rarely necessary, but certain extreme engineering applications demand it.
Best Used For:
Heavy-duty mechanical gears, structural components subjected to intense crushing forces, and items requiring significant dead weight.
Why It Works:
Solid or near-solid plastic prevents internal buckling under heavy compressive loads. However, going from 40% to 100% infill rarely doubles your strength, but it will double your print time and material cost.
The Power of Perimeter Walls
The most effective way to strengthen a 3D print is not by increasing infill density, but by adding more perimeter walls. Adding just one or two extra walls (moving from 2 walls to 4 walls) exponentially increases tensile strength and load resistance while adding far less weight and print time than a dense infill core.
Shifting your focus away from dense internal cores and prioritizing robust outer shell configurations will drastically improve mechanical performance while saving hours of print time and costly filament.


