
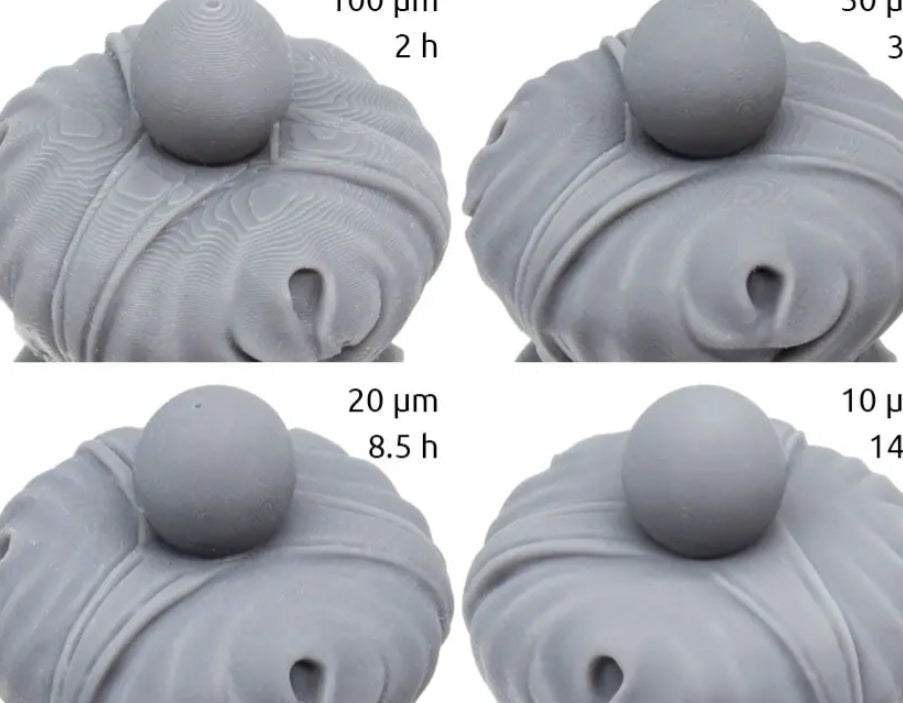
Achieving the right balance between surface finish, structural integrity, and print time comes down to one critical slicer setting: layer height. Measured in millimeters, layer height dictates the thickness of each individual slice of plastic your printer deposits vertically.
Understanding how layer height impacts your final print will help you choose the ideal setting for everything from high-detail miniatures to fast functional prototypes.
Fine Layer Heights (0.08mm to 0.12mm)
Fine layer heights deliver incredible surface resolution, minimizing the visibility of individual layer lines.
Best Used For:
Highly detailed miniatures, smooth organic sculptures, cosplay props with intricate curves, and small mechanical parts that require tight tolerances.
Pros:
Exceptional surface detail, smoother slopes, and minimal post-processing or sanding required.
Cons:
Dramatically increases print times—often doubling or tripling the duration of a print compared to standard settings. It also places higher demands on your printer's Z-axis calibration.
Standard Layer Heights (0.16mm to 0.20mm)
The "sweet spot" for most FDM 3D printing, 0.20mm (often paired with a standard 0.4mm nozzle) offers the best all-around compromise.
Best Used For:
Everyday prints, tabletop terrain, bracket designs, and general prototyping.
Pros:
Provides a solid balance between visual quality and speed. Layer lines are still visible upon close inspection, but look clean and uniform.
Cons:
Not ideal for ultra-fine miniatures or objects where absolute smooth surfacing is critical straight off the build plate.
Coarse Layer Heights (0.28mm to 0.40mm+)
When time is of the essence or you are printing large, robust functional parts, scaling up your layer height is the way to go.
Best Used For:
Large structural prototypes, industrial brackets, internal mechanical components, and rapid iteration drafts where aesthetics don't matter.
Pros:
Drastically cuts down print times (often by 50% or more) and increases inter-layer adhesion for stronger, more durable parts.
Cons:
Noticeable "stepping" or ribbed texture on vertical surfaces, lower resolution on fine features, and reduced overhang performance.
Understanding Nozzle Diameter Limits
When adjusting your layer heights, remember the golden rule of slicing: your layer height should never exceed 80% of your nozzle diameter. For instance, a standard 0.4mm nozzle has a maximum safe layer height of about 0.32mm.
Pushing past this threshold causes poor layer squish, weak inter-layer bonding, and potential structural failure. Conversely, you can go as low as roughly 25% of your nozzle diameter before experiencing extrusion anomalies.
Beyond surface finish and print duration, matching your layer height to your physical nozzle constraints is essential for maintaining proper extrusion pressure and avoiding interlayer delamination.


