
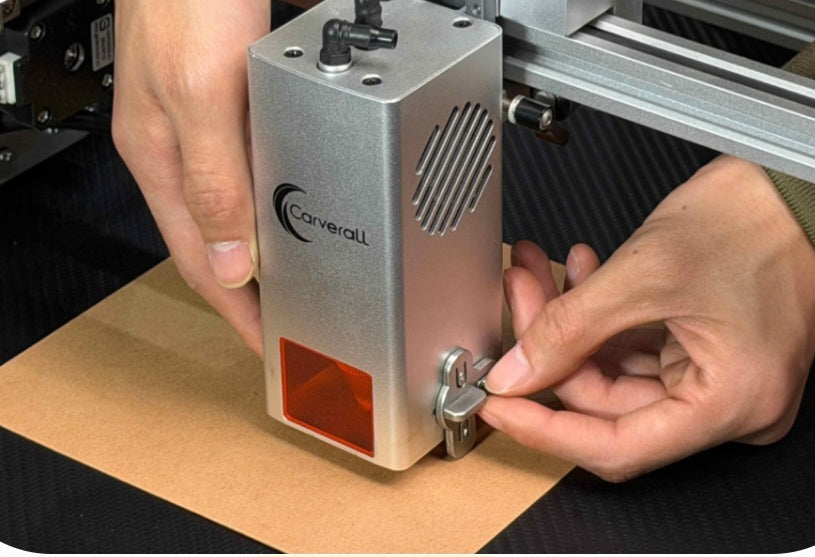
Achieving a precise focal point is the single most important step for getting clean cuts and crisp engravings. Because diode lasers have a tight beam path, even a fraction of a millimeter off-focus will cause the laser beam to widen, drastically losing its power and cutting capability.
The Fixed Focus Block (Spacer Method)
Most consumer diode laser engravers (like Ortur, xTool, or Atomstack) come with a small metal or acrylic block designed specifically for your module.
Loosen the Thumb Screw:
Slightly loosen the retaining screw holding the laser module in place on the carriage bracket.
Place the Spacer:
Place the provided focus block or spacer directly on top of your material right underneath the laser lens casing.
Lower the Module:
Slide the laser module down until the bottom of the lens housing rests flush against the top of the focus block.
Secure and Tighten:
Lock the thumb screw back down tightly, then remove the spacer. Your laser is now set to the manufacturer's exact focal distance.
The Ramp Test (Manual Fine-Tuning)
If your machine did not come with a focus block or you are using a custom lens, the ramp test is the most accurate way to find the precise focal point.
Set Up a Slanted Ramp:
Place a piece of scrap wood or thick cardboard on your laser bed at an angle (propped up on one end at roughly a 10 to 15-degree angle, or use a wedge).
Run a Straight Line:
In your laser software, program a simple straight horizontal line or vector path to run down the length of the slanted material at a fast speed and medium power.
Locate the Thinnest Point:
Inspect the burned line on the wood. You will notice the line is wide at both ends and pinches down into a single, razor-thin point where the laser was perfectly focused.
Measure and Adjust:
Measure the exact height of the board at that thinnest point. Adjust your laser's Z-axis or physical bracket height to match that precise measurement.
Electronic or Fixed-Pin Focus (Built-In Gauges)
Many modern diode lasers feature a flip-down metal pin attached directly to the laser module.
Lower the Laser:
Lower the module until the fold-down pin touches the surface of the material.
Lock in Place:
Tighten the module into position.
Flip It Back:
Flip the pin back up and away from the cutting path so it doesn't obstruct the laser during operation.
Pro-Tips for Accurate Focusing
Always Focus on the Material Surface (or Just Below):
For standard engraving, focus directly on the top surface of the stock. For thicker cutting passes (like 3mm or 5mm plywood), professional makers often drop the focus point about one-third to halfway into the depth of the material so the narrowest part of the beam hits inside the wood.
Re-Check When Changing Material Thickness:
If you switch from thin paper to thick acrylic, your focal distance changes. Always reset your focus whenever you change material thicknesses.
Keep the Lens Clean:
Debris, smoke residue, and dust on the outer glass window of your diode laser will diffuse the beam, making it impossible to achieve a sharp focus. Wipe it gently with an isopropyl alcohol swab regularly.


