
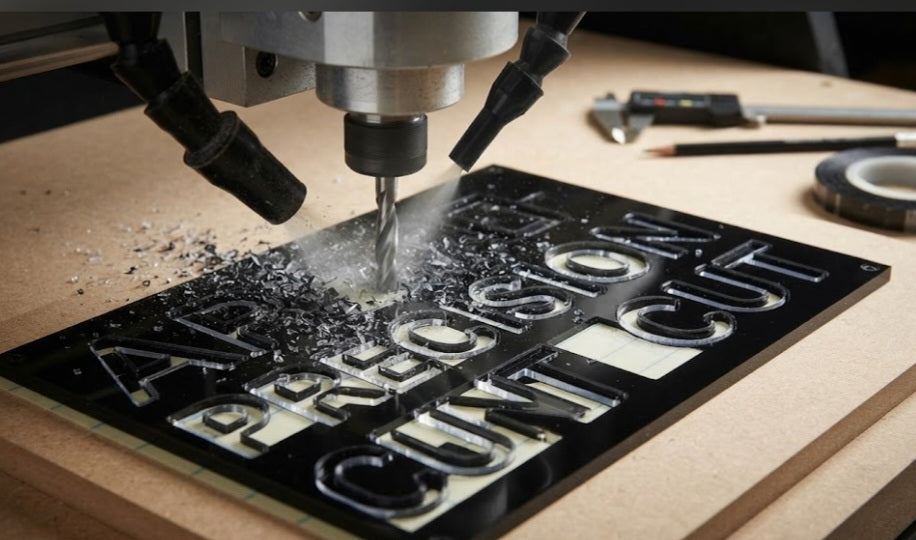
When you run a desktop CNC router to fabricate custom dimensional lettering, intricate logos, or multi-part signage, few workshop scenarios are as frustrating as watching tiny acrylic letters break free mid-cut. Acrylic is a rigid, unforgiving substrate, and when you cut out micro-components—such as characters under 30mm tall—the forces exerted by a spinning end mill can easily catch, flip, or launch the pieces across the room. This not only destroys your material and ruins the project but can also snap delicate micro-tools or damage the workpiece.
Traditional screw-down clamps or bulky surface vises are completely useless for holding tiny letters because the clamp bodies sit right in the path of your toolpaths. To achieve professional, flawless results without destroying your fine acrylic letters, you need to master advanced workholding techniques. Let's explore how to combine specialized adhesive strategies, calculated tab placements, and smart G-code sequencing to keep your miniature parts pinned down securely until the final pass.
The Physics of Part Lift:
As a router bit breaks through the bottom layer of cast or extruded acrylic, residual internal stresses and tool vibration cause small cutouts to lift up and slap against the bit.
The Danger of Double-Sided Tape Failure:
Standard office tape lacks the shear strength required for high-RPM milling, causing parts to slide under lateral cutting loads.
The Role of Holding Tabs:
Leaving microscopic bridges of material anchors individual letters to the surrounding stock, preventing movement during machining.
Choosing the Right Bit:
Single-flute spiral O-flute bits evacuate melted plastic chips cleanly, reducing friction heat that can otherwise weld cut pieces back together.
Step-by-Step Holding Protocol
Securing miniature acrylic components requires a systematic approach to surface prep and mechanical workholding before you press start on your controller.
Surface Preparation and Degreasing:
Clean the bottom face of your cast acrylic sheet and your MDF spoil board thoroughly with isopropyl alcohol. Any dust, oils, or manufacturing residue will destroy adhesive bonding strength.
Industrial-Grade Workholding Tape:
Apply strips of high-adhesion carpet tape or specialized CNC holding tape (such as 3M transfer tape) in a parallel grid across the entire bottom surface of the acrylic sheet. Press the sheet down firmly onto the spoil board using a heavy roller to maximize surface contact.
Designing Micro-Tabs in CAM:
In your CAD/CAM software, program 3D tabs (or rectangular bridges) that are roughly 1.0mm wide and 0.5mm thick on the perimeter of each letter. For ultra-small letters where tabs are difficult to hand-file later, use onion-skin milling—leaving a microscopic 0.2mm skin across the entire bottom of the cut that you can easily snap and sand away afterward.
Optimizing Cutting Direction and Passes:
Program your toolpaths to cut in a conventional or climb milling direction that pushes the part down into the adhesive bed rather than pulling it upward. Always use multi-pass depth cuts rather than plunging full depth in one heavy pass.
Managing Melt and Re-Welding:
If your feed rate is too slow, the friction will melt the acrylic edges, causing the cut particles to resolidify behind the bit and lock the letter in place. Keep your chip load high and steady.
Post-Processing and Clean-Up:
Once the job finishes, use a stiff putty knife to gently pry up the acrylic sheet. Clip the holding tabs flush with diagonal cutters, and clean up residual tab marks using a fine diamond hand file or 400-grit sandpaper.
Mastering workholding for miniature acrylic components transforms your CNC workflow from a game of chance into a predictable, high-precision manufacturing process. By combining aggressive industrial adhesive tape with properly engineered holding tabs and clean-cutting O-flute bits, you eliminate part shifting and achieve pristine, production-grade signage every time.
Beyond adhesive tapes and physical tabs, mastering microscopic acrylic machining ultimately depends on thermal management and coolant misting strategies. Acrylic has a very low glass transition temperature, meaning localized frictional heat from a high-speed router bit can cause the polymer to soften, stretch, and wrap around the cutting edge instead of shearing cleanly. Integrating a low-pressure compressed air blast or a minimal oil-mist cooling system directly at the point of contact dissipates thermal energy instantly, preventing the molten plastic from re-bonding your tiny letters into the waste skeleton and ensuring razor-sharp perimeter edges straight off the machine bed.


