
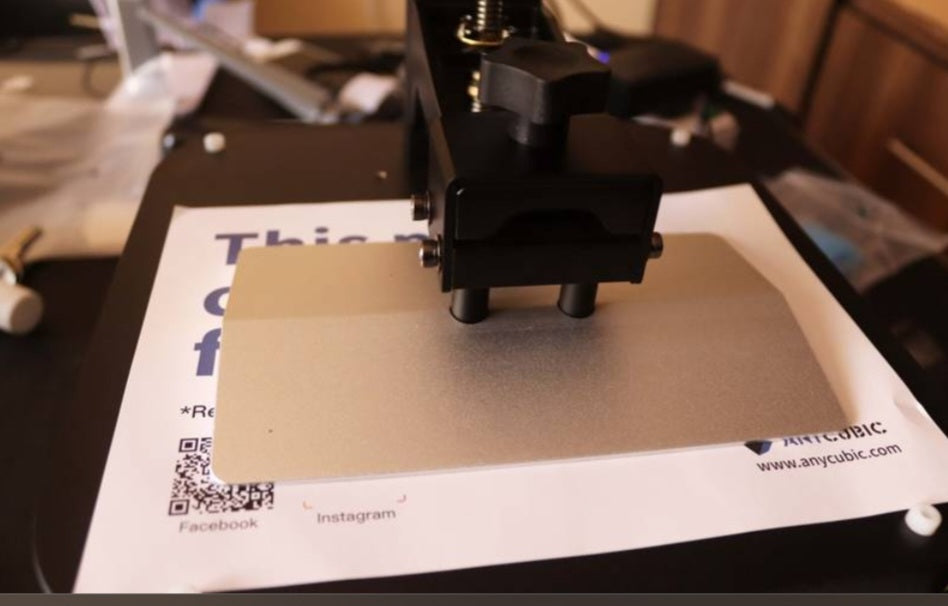
If your resin 3D prints are constantly failing, warping, or peeling off the build plate halfway through a job, the culprit is often hiding in plain sight.
Before tweaking your exposure times or changing your resin, you need to check the foundation of every successful print: build plate leveling.
Unlike filament printers that often rely on complex auto-leveling mesh grids, most resin 3D printers use a manual leveling process. Getting this right ensures an even, microscopic gap across the entire printing screen for your first crucial base layers.
Here is a straightforward, professional guide to leveling your resin 3D printer build plate correctly every single time.
Tools You Will Need
Included Allen wrench (usually supplied with your printer)
A standard sheet of printer paper or leveling card
Paper towels and 99% Isopropyl Alcohol (IPA)
Protective gloves and safety glasses
Step-by-Step Leveling Guide
Step 1:
Clean the Build Plate and LCD Screen
Before starting, ensure there is no residual resin, dust, or debris on the build plate or the vat screen. A clean surface guarantees a true, flat reference point. Remove the resin vat entirely to give yourself a clear workspace.
Step 2:
Loosen the Build Plate Screws
Using your Allen wrench, loosen the screws holding your build plate in place. Usually, there is a main bolt securing the plate to the ball joint, and sometimes a secondary leveling screw on the side. You want the plate to have free play—able to tilt and swivel slightly in all directions—while still staying attached to the arm.
Step 3:
Place Your Leveling Paper
Lay a clean sheet of standard printer paper flat over the LCD exposure screen. This paper creates the exact micro-gap required between the build plate and the screen so your first layer can bond correctly without crushing the film.
Step 4:
Home the Z-Axis
Navigate to your printer's control menu, select Tools (or Settings), click Manual, and hit the Home icon (the house symbol).
The build plate will lower itself down until it presses flat against the paper on top of the screen, then stop automatically.
Do not force the plate down manually; let the machine's z-axis motor complete the homing sequence.
Step 5:
Secure and Lock the Plate
While holding the build plate gently flat against the paper with one hand to prevent it from shifting, use your other hand to tighten the main adjustment screws securely. Alternate between screws if there is more than one to ensure even pressure.
Pro Tip:
Do not over-torque the screws to the point of stripping them, but make sure they are tight enough that the plate will not shift under suction forces.
Step 6:
Test the Tension
Gently pull on the sheet of printer paper. You should feel a smooth, consistent resistance—like pulling paper out of a tight catalog or notebook. If the paper slides out completely freely, the gap is too wide. If it is completely locked and rips when you pull, the plate is too tight.
Step 7:
Set the Z-Axis Zero (Z=0)
Once you are happy with the paper resistance:
Use the screen controls to raise the build plate slightly (e.g., 0.1mm to 1mm) just to pull the paper out.
Navigate back to your menu and look for the Set Z=0 option.
Confirm your selection when the prompt asks if you want to set the current position as the new zero origin. This tells the printer exactly where home base is for every future print.
Lock In Your Success
Leveling your build plate takes less than five minutes, but it is the single most effective maintenance habit you can develop. By keeping your plate perfectly parallel to your screen with a consistent paper-thin gap, you will eliminate uneven adhesion failures and drastically improve your resin printing reliability.
Additional Pro-Tip: When to Re-Level
While proper leveling sets you up for long-term success, you do not need to re-level before every single print. A good build plate should hold its calibration through dozens of successful runs. However, you should always re-level your plate immediately if you experience any of the following:
Severe Print Failures:
If an entire print rips off the plate and bakes onto your FEP film, the physical impact or heavy suction can knock the bracket out of alignment.
Resin Vat Maintenance:
If you remove or replace your FEP film, or notice uneven peeling sounds during printing, it is always best to verify your zero position.
Accidental Bumps:
If the build plate takes a hard knock while scraping off a stubborn print or during routine cleaning, take two minutes to run through the leveling sequence again to save yourself a failed build later.


