
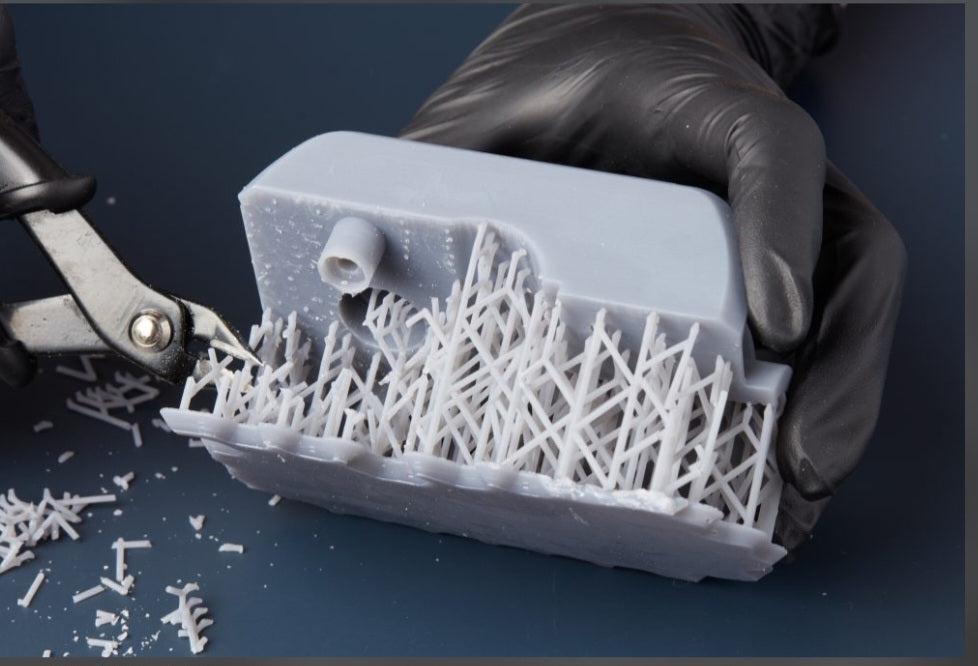
There is nothing quite like pulling a complex, high-detail resin print off your build plate, washing it, curing it, and then realizing the entire surface is covered in ugly, jagged white scabs left behind by your supports.
For many hobbyists, post-processing is the most tedious part of 3D printing—especially when removing heavy scaffolding rips chunks right out of your model's best details.
While supports are a necessary evil in resin printing, you don't have to live with scarred surfaces. With the right combination of slicer settings, pre-treatment tricks, and clean removal techniques, you can drastically reduce support marks and achieve a glass-smooth finish.
Phase 1:
Optimize Your Slicer Settings
The easiest way to make support removal painless is to configure your slicer (like Chitubox or Lychee) correctly before you ever hit export.
- Adjust Contact Depth and Diameter
Default slicer settings often use excessively thick support tips that dig deep into your model.
Reduce your Contact Diameter down slightly (e.g., to 0.4mm or 0.5mm for standard miniatures and models).
Lower the Contact Depth so the support barely bites into the surface while still holding the weight of the print.
2. Use Light or Medium Supports for Visible Areas
Never use heavy supports on the front-facing or highly detailed sections of your model. Reserve heavy supports exclusively for the unseen bottom base or internal anchor points, and use light or medium pins on delicate features.
3. Tweak the Tip Shape (Cone Tips)
Many modern slicers allow you to change the shape of the support tip where it touches the model. Choose a conical tip design. It creates a tiny pinprick contact point that snaps off cleanly, leaving a microscopic dot rather than a massive flat chunk.
Phase 2:
The Warm Water Trick (Game Changer)
If you pull your print straight off the build plate and try to clip off hard, fully-cured resin supports with flush cutters, you are asking for chips and fractures.
The Secret:
Remove your supports after your initial wash (IPA bath) but before final UV curing.
The Warm Water Method:
Soak your washed, uncured (or partially cured) print in a bowl of hot tap water (around 50°C to 60°C / 120°F to 140°F) for 1 to 2 minutes. The warmth softens the polymer resin just enough to make the support tips flexible and butter-soft.
You can easily peel or snip them away with your fingernails or precision flush cutters with almost zero risk of tearing the surface.
Phase 3:
Proper Cutting Technique
Never pull, rip, or tear supports off with your bare hands. Tearing creates jagged micro-fractures that pull layers apart beneath the surface.
Use sharp, precision micro-flush cutters.
Never cut flush to the surface. Always leave a tiny, microscopic stub (about 0.5mm) protruding from the model. You will sand down that remaining nubbin in the final step rather than risking a deep divot if the cutter slips.
Phase 4:
Sanding and Smoothing the Nubs
Once your model is fully post-cured under your UV lamp, take care of those remaining micro-stubs:
Scrape gently:
Use the flat edge of a hobby knife (X-Acto) to gently shave down any remaining bumps.
Wet Sanding:
Use ultra-fine wet sandpaper (grit sizes ranging from 800 to 2000 grit). Wet sanding keeps plastic dust down, prevents friction heat from warping resin details, and creates an ultra-smooth finish.
The UV Resin / Gloss Trick:
If you accidentally gouged a small hole or chip while removing a stubborn support, don't panic. Dab a tiny drop of liquid UV resin onto the imperfection using a toothpick, cure it instantly with a mini UV flashlight, and sand it flush.
Flawless Finishes Every Time
Getting rid of ugly support marks isn't about magic—it's about smart slicing, softening your prints with warm water, and taking your time with precision cutters. Master these simple habits, and your resin models will look clean, professional, and gallery-ready straight out of the box.


