
If you lift a newly cut piece of wood, acrylic, or leather off your laser bed only to find dark, sooty, or burnt edges, you are dealing with one of the most common issues in laser crafting.
While some charring is a natural byproduct of a high-heat thermal process, excessive dark soot, sticky resin buildup, or stained face stock can ruin the professional look of your project.
Understanding why charring happens is the first step toward getting clean, beautiful edges every time. Here are the primary culprits behind charred laser-cut edges and how to fix them.
Insufficient or Misaligned Air Assist
The Problem:
The air assist compressor blows a steady stream of air right at the point where the laser beam meets the material. Its primary job is twofold: to blow away smoke and debris instantly, and to cool the material to prevent runaway combustion (flaring). If your air assist is set too low, turned off, or blocked by a misaligned nozzle, smoke lingers in the cut kerf, depositing dark soot all over the edges and surface.
The Fix:
Always verify that your air compressor or built-in pump is running at full power before starting a cut. Check your laser nozzle to ensure the airflow is centered over the beam path and that the tip isn't clogged with resin or debris.
Incorrect Cutting Parameters (Speed vs. Power)
The Problem:
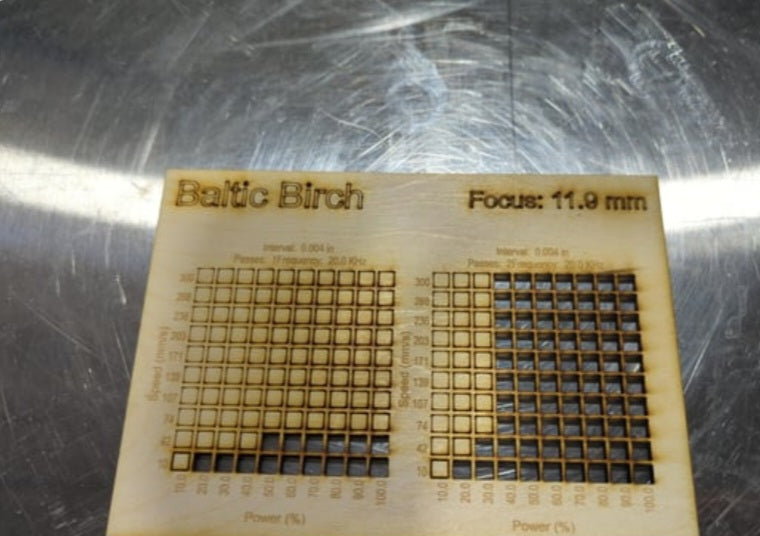
Laser settings dictate how much thermal energy is dumped into the material. If your cutting speed is too slow, the laser lingers too long in one spot, burning a wide kerf and baking the surrounding material. Conversely, if your power is cranked way too high for a thin material, you will cause excessive scorching.
The Fix:
Run a test grid or linear speed/power test to find the fastest possible speed that still achieves a clean, single-pass cut. Minimizing the time the laser beam spends in the material drastically reduces heat buildup and charring.
High Resin Content in the Wood
The Problem:
Not all woods react to lasers the same way. Natural softwoods like pine, fir, and certain plywoods (like standard hardware store ply) contain high concentrations of natural resins, sap, and glues. When the laser vaporizes the wood, these resins liquefy, boil, and re-solidify as a sticky, dark brown, or black residue along the cut edges.
The Fix:
Switch to low-resin, laser-friendly woods such as Baltic Birch plywood, basswood, or MDF. If you must use resin-heavy woods, applying masking tape before cutting can protect the surface.
Trapped Smoke and Poor Exhaust Ventilation
The Problem:
If your exhaust fan is weak, clogged, or venting improperly, smoke and combustion byproducts get trapped inside the enclosure. Instead of being sucked away, the heavy smoke settles back down onto your material, staining the cut edges and leaving a dull haze over the face of your project.
The Fix:
Clean your exhaust ducting and fan blades regularly to maintain strong airflow. Ensure your honeycomb or slat bed is clean so smoke can easily escape downward out of the cutting zone.
Pro Tip: How to Clean Up Charred Edges
If you still end up with minor charring on delicate projects, don't worry! You can easily clean up the edges with a quick sanding block, a magic eraser (if the material isn't too porous), or by wiping the edges with a microfiber cloth dampened slightly with rubbing alcohol.
For production work, applying transfer tape or painter's tape to the wood surface before cutting completely eliminates surface smoke staining!


