
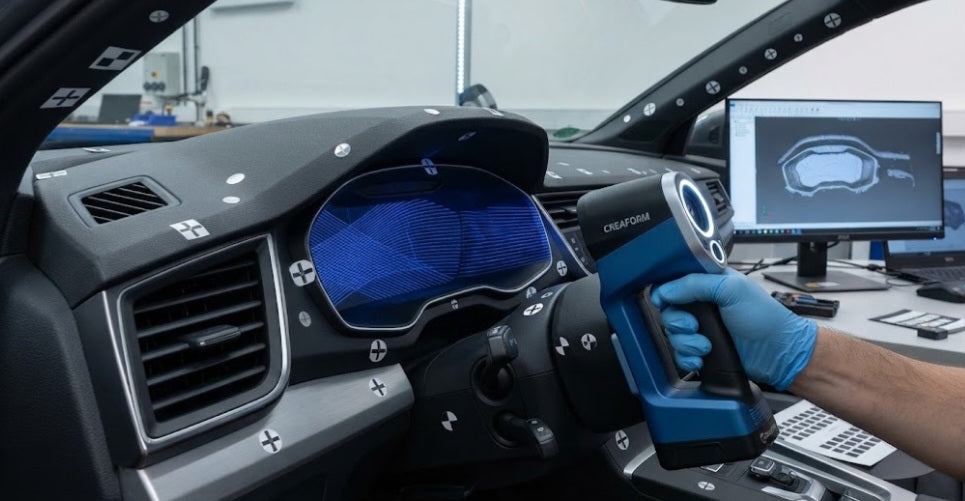
When embarking on custom interior fabrication, digital dash retrofits, or roll cage integration, reverse-engineering a modern vehicle dashboard is one of the ultimate tests of metrology skill. Car dashboards are notorious optical geometry traps. They feature sprawling, sweeping organic contours that transition abruptly into steep, shadowed air vents, hidden glovebox cavities, and deeply recessed instrument cluster housings. Attempting to scan these cavernous voids with standard wide-angle laser settings inevitably leads to optical occlusion, where the scanner's camera sensors lose line-of-sight with the projected laser lines inside the recess, resulting in frustrating data dropouts and gaping holes in your digital mesh.
Conquering deep recesses requires shifting away from broad, sweeping configurations and adopting specialized probe orientations, single-line laser modes, and intelligent tracking strategies. Let's explore the step-by-step setup protocol required to successfully capture deep dashboard cavities without losing your global coordinate reference.
The Physics of Optical Occlusion:
Understanding the critical angle between a scanner's laser projector and its CMOS camera lenses explains why deep, narrow pockets cause data shadowing.
Leveraging Single-Line and Fine-Pitch Modes:
Switching from wide cross-line arrays to targeted single-line or parallel beam configurations concentrates photon energy deep inside tight cavities.
Global Target Constellations:
Placing external hybrid tracking markers across the steering column and windshield pillars maintains global tracking stability when the scanner dips inside dark recesses.
Managing Spatial Reflections:
Dashboards are typically cast from heavily textured, low-gloss polymers that absorb light, but surrounding windshield glass and chrome bezels can reflect stray laser glare and corrupt point clouds.
Step-by-Step Dashboard Scanning Protocol
Capturing complex automotive interiors requires a disciplined sequence of tracking setup, probe angle management, and multi-stage scanning passes.
Environmental Preparation and Masking:
Clean the dashboard surfaces to remove dust and armor-all residues that can interfere with optical tracking. Mask off clear instrument cluster acrylic and windshield glass with low-tack painter's tape to prevent erratic reflections.
Establishing Global Reference Markers:
Stick coded and uncoded alignment targets strategically around the perimeter of the dashboard and across adjacent door pillars. This creates a robust photogrammetry-based global frame that keeps the scanner oriented even when tracking inside deep, featureless glovebox liners.
Configuring the Scanner for Recessed Cavities:
Switch your handheld scanner from wide-area cross lines to high-density parallel lines or a dedicated single-line deep-pocket mode. Increase laser power slightly to compensate for the light falloff inside dark air-conditioning ducts.
Executing Orbital Sweeps into Cavities:
Approach deep recesses at a shallow, acute angle rather than pushing the scanner straight in head-on. Gently orbit the scanner nozzle around the rim of the vent or cluster housing, allowing the side-mounted cameras to maintain visual lock on external reference targets.
Stitching Internal Cavities to Surface Shells:
Capture the deep internal ducting as a separate sub-scan pass, then align it back to the main dashboard shell using common reference features or shared alignment markers in your metrology software.
Validating Hole-Filling and Mesh Integrity:
Inspect the resulting STL mesh inside your reverse-engineering software to ensure that internal transition fillets are smooth and that no non-manifold geometry or self-intersections were created during automated hole-filling passes.
Advanced Thermal Stability and Ergonomic Control
Beyond optical line-of-sight and target placement, scanning large interior assemblies like a dashboard is heavily influenced by operator ergonomics and cumulative thermal expansion. Reaching deep across a center console or leaning over a steering column introduces natural body fatigue, which can cause micro-jitters in your sweep path and distort local point accuracy. Furthermore, vehicle interiors left parked in a workshop can absorb ambient heat rapidly, causing subtle structural shifting in large plastic components over the course of a multi-hour scanning session. Ensuring a stable, climate-controlled workspace and taking deliberate pause intervals guarantees ultimate dimensional consistency.
Capturing deep recesses in an automotive dashboard pushes handheld metrology to its operational limits. By mastering optical occlusion angles, transitioning to specialized single-line laser modes, and maintaining robust global tracking markers, you can successfully digitize complex interior cavities with absolute precision.


